Solo 3

Introduction:
Smooth By Santana is a mix of rock, blues, and it combines some melodies of Latin rhythms as well. So if you are someone who is interested in learning the ways of Santana this should be a great starting point for your musical journey.
Fun Fact: In the beginning the song was called Room 17 and the idea of the song came to the mind of Itaal Shur, but then lyrics were all take out from the song and it was given to Rob Thomas, who completely re-wrote the song and changed its original melody, that’s how Smooth came into existence by Santana.
Chords Used in Song Guitar Lesson
Arpeggios Verse & Chorus Chords: The arpeggios for this song are as follows:
e|------1-------------|
B|----3---3----------|
G|--2-------2--------|
D|--------------------|
A|--------------------|
E|--------------------|
Strumming Pattern
There are two strumming patterns for this song, the first one is pretty basic and you can play it like this: DD UU DU.
- D = Down Strum
- U = Up Strum
Or you can play this version which adds more groove to the song: DD X UDU.
- D = Down Strum
- U = Up Strum
- X = Muted Strum
Song Structure
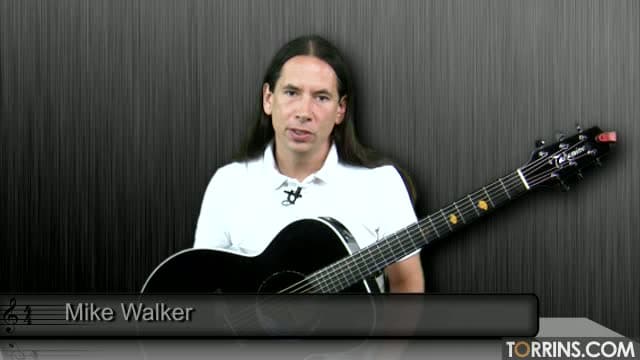
Introduction: In this introduction, Mike is going to show you how to tune up your guitar for this song.
Song Arrangement: Here, you will learn about the different guitar rhythms that you will be following as you play the song. Mike starts explaining every rhythm starting with the intro section.
Song Demo: Over here, Mike is going to show you how to play the guitar parts of the song with the backing track.
Solo 1: From this part, you will start learning how to play different solos which come in the song. This is the first solo performed by Santana in the first part of the song.
Overdub Licks: This particular section shows how to play a particular lick which is being played at the 32 second of the track.
Solo 2: This is the second solo from the song.
Solo 3: Solo which comes after the verses.
Outro Solo: This one is the last solo which Santana played and it was used as an outro for the song.
Why Learn Smooth By Santana?
Carlos Santana is known throughout the world for his amazing phrasing and his ability to sustain heavy tones on the guitar. As you learn this song, you will get to know about techniques like Vibrato, sustain, melodic soloing and smooth transition between the lead and the rhythm of the song.
FAQs-This Song Guitar Lesson
Q1. Who originally sang “Smooth?”
Ans. Smooth was performed by Santana & Rob Thomas who were part of a band called Matchbox Twenty. This song was released as a lead single from the 1999s studio album, Supernatural.
Q2. What made Santana so famous in the music industry?
Ans. Santana became much more popular after their incredible set which they performed live at Woodstock in 1969. In that same year, the band also released their self-entitled LP as well.
Q3. Is Santana considered to be a good guitarist of his time?
Ans. Santana is known to be the man who invented the Latin rock guitar genre, making it stand as one of the best of his generation.
Introduction:
Smooth By Santana is a mix of rock, blues, and it combines some melodies of Latin rhythms as well. So if you are someone who is interested in learning the ways of Santana this should be a great starting point for your musical journey.
Fun Fact: In the beginning the song was called Room 17 and the idea of the song came to the mind of Itaal Shur, but then lyrics were all take out from the song and it was given to Rob Thomas, who completely re-wrote the song and changed its original melody, that’s how Smooth came into existence by Santana.
Chords Used in Song Guitar Lesson
Arpeggios Verse & Chorus Chords: The arpeggios for this song are as follows:
e|------1-------------|
B|----3---3----------|
G|--2-------2--------|
D|--------------------|
A|--------------------|
E|--------------------|
Strumming Pattern
There are two strumming patterns for this song, the first one is pretty basic and you can play it like this: DD UU DU.
- D = Down Strum
- U = Up Strum
Or you can play this version which adds more groove to the song: DD X UDU.
- D = Down Strum
- U = Up Strum
- X = Muted Strum
Song Structure
Introduction: In this introduction, Mike is going to show you how to tune up your guitar for this song.
Song Arrangement: Here, you will learn about the different guitar rhythms that you will be following as you play the song. Mike starts explaining every rhythm starting with the intro section.
Song Demo: Over here, Mike is going to show you how to play the guitar parts of the song with the backing track.
Solo 1: From this part, you will start learning how to play different solos which come in the song. This is the first solo performed by Santana in the first part of the song.
Overdub Licks: This particular section shows how to play a particular lick which is being played at the 32 second of the track.
Solo 2: This is the second solo from the song.
Solo 3: Solo which comes after the verses.
Outro Solo: This one is the last solo which Santana played and it was used as an outro for the song.
Why Learn Smooth By Santana?
Carlos Santana is known throughout the world for his amazing phrasing and his ability to sustain heavy tones on the guitar. As you learn this song, you will get to know about techniques like Vibrato, sustain, melodic soloing and smooth transition between the lead and the rhythm of the song.
FAQs-This Song Guitar Lesson
Q1. Who originally sang “Smooth?”
Ans. Smooth was performed by Santana & Rob Thomas who were part of a band called Matchbox Twenty. This song was released as a lead single from the 1999s studio album, Supernatural.
Q2. What made Santana so famous in the music industry?
Ans. Santana became much more popular after their incredible set which they performed live at Woodstock in 1969. In that same year, the band also released their self-entitled LP as well.
Q3. Is Santana considered to be a good guitarist of his time?
Ans. Santana is known to be the man who invented the Latin rock guitar genre, making it stand as one of the best of his generation.
Explore More in English Songs


Introduction:
Torrins brings you another country sing-and-play lesson "You Ain’t Goin’ Nowhere", recorded by The Byrds and originally written by Bob Dylan. Taught by Mike Dugan, this lesson makes it easy for anyone to learn, whether you’re just starting out or looking to refine your rhythm and strumming technique.
Fun Fact: Bob Dylan wrote You Ain’t Goin’ Nowhere in 1967 during his self-imposed exile following a motorcycle accident. The Byrds later popularized the song with their signature country-rock sound.
Chords & Song Structure
This song is played in the key of G and follows a simple country chord progression, making it a very easy song to learn and play for players of all skill levels.
Chords Used - G, Am, and others. Mike walks through the finger placements and transitions, ensuring you get a smooth chord change.
The lesson also covers chord distribution across measures, making it easy to follow along and learn.
Strumming Pattern & Rhythm
The song has two strumming approaches:
- Beginner-Friendly Strumming – Simple downstrums that keep the rhythm steady and easy to sing along with.
- Advanced Strumming – For players looking to add more depth, Mike introduces a DDUDD pattern, explaining where to add accents for a more dynamic sound.
The lesson also includes tips on rhythm timing to attain the song’s natural flow.
Sing & Play
One of the biggest challenges for many players is singing while playing. Mike breaks down the coordination between vocals and guitar, showing:
- Which words align with downstrums
- Where to pause or hold a chord
- How to gradually add complexity to your strumming without losing the vocal flow
If you want to be the life of the party, this lesson will help you sing and play smoothly, even if you’ve never done it before. So, get your guitar ready and start strumming along to this timeless country classic today.
Final Playthrough – Bringing It All Together
Mike plays through the entire song twice—once with the beginner strumming pattern and then with the advanced version. The song has a retarded (slowed-down) ending, which he explains in the end.
He also advises starting with simple strumming, building confidence, and then progressing to advanced strumming techniques.
Why Learn You Ain’t Goin’ Nowhere?
Perfect for beginners – The song has easy chords, simple structure, and a laid-back strumming pattern.
Great for sing-alongs – It will help you learn how to balance vocals and guitar.
Ideal for country and folk lovers – The song has a classic country rhythm and storytelling approach to the lyrics.
FAQs – You Ain’t Goin’ Nowhere Guitar Lesson
Q1: Is this lesson beginner-friendly?
Yes! This lesson is one of the easiest sing-and-play songs to learn on Torrins.com.
Q2: What if I struggle with advanced strumming?
Stick with the basic downstrums first. Once you're comfortable, move on to the DDUDD pattern with accents.


Introduction
Learn the famous “I Shot the Sheriff” on Torrins, led by our expert instructor Steve Luciano, who has decades of experience playing and teaching guitar. “I Shot the Sheriff” is originally a reggae song written by Bob Marley and released in 1973 with his band, The Wailers. However, you'll be playing Eric Clapton’s version of this song with Steve on Torrins.com. Eric recorded his cover in 1974 for his album 461 Ocean Boulevard. His performance of the song adds soft rock to the reggae sound, giving it a unique feel.
The difficulty level of this guitar lesson ranges from beginner to intermediate and breaks down the chords, rhythm, structure, and strumming pattern in a simple yet engaging way! So, tune in and unfold the magic of this hit cover!
Steve Luciano teaches the I Shot The Sheriff Song guitar lesson using 4 movable chords: Gm, Cm, Eb, and Dm. No capo is needed!
Chords Used in I Shot the Sheriff Guitar Lesson
This song is played using movable chords, which are common in reggae music.
Chords used: Gm, Cm, Eb, Dm
Steve teaches essential finger positioning and movement techniques to help make chord transitions smoother. He also demonstrates how to lighten finger pressure to achieve the signature reggae "deadening" effect on the strings.
Strumming Pattern
Pattern: D-U-D-U
- Like other reggae songs, this one emphasizes playing on the downbeat but feeling the upbeat to capture its groove.
- It’s good if you practice the chords first before adding rhythm, as some transitions can be tricky.
Song Structure
This song follows a verse-chorus format:
- Verse: The beginning of the song primarily uses Gm and Cm chords.
- Chorus: Introduces the Eb chord, which can be challenging for some players. Steve demonstrates easier ways to play Eb, particularly for those with larger fingers.
- The chorus chord progression repeats five times.
- At the end of the chorus, there's a signature single-note tag based on the Gm pentatonic scale. This lick is played each time the chorus ends.
Improvisation Techniques
- The song features a signature lick at the end of the chorus, based on the Gm pentatonic scale. Steve breaks down how to play the notes smoothly to maintain the song’s groove.
Why Learn I Shot the Sheriff on Guitar?
- Learning this song can help you master movable chord shapes commonly used in reggae.
- It will also help you improve reggae-style strumming and chord muting techniques.
- Additionally, it provides insight into lead guitar phrasing with the signature pentatonic lick.
Tips for Playing the Song Smoothly
- Practice chord transitions first before adding strumming.
- Loosen your grip to achieve the proper reggae deadening effect.
- Feel the upbeat while strumming for an authentic reggae sound.
FAQs – I Shot the Sheriff Guitar Lesson
Q1. Is this song beginner-friendly?
A: It’s suitable for intermediate players, as it uses movable chords, which may be challenging for beginners.
Q2. What if I struggle with the Eb chord?
A: Steve demonstrates easier alternatives for players who find it difficult, especially those with larger fingers.
Fun Fact: “I Shot the Sheriff” was originally a spiritual metaphor for birth control, though Bob Marley never revealed which lyrics were true. Eric Clapton’s 1974 cover became a massive hit, introducing Marley’s music to rock audiences worldwide. While Marley was happy with the cover, he was frustrated that the song was widely misinterpreted as an anthem against injustice and corruption rather than its original meaning.


Similar Rock Songs

Introduction
It’s time to grab your guitar and start strumming along with this detailed Let It Be guitar lesson on Torrins.com! This beginner-to-intermediate lesson is taught by our experienced tutor, Steve Luciano, who breaks down various components of the song—chords, rhythm, strumming pattern, and arrangement—into easy, digestible segments, helping you progress smoothly from one section to the next.
Interesting Fact: This classic Beatles song has a heartfelt story behind it. Paul McCartney wrote Let It Be after dreaming of his late mother, Mary, during a stressful time for The Beatles in 1968. In the dream, she comforted him, saying, “It will be all right, just let it be.” That message stayed with him and became the heart of the song. While many assume "Mother Mary" refers to the Virgin Mary, McCartney says it's open to interpretation.
The Let It Be guitar lesson is played in the key of C and consists of just four chords, two of which are C and F. Tune into the full lesson to learn the rest!
Chords Used in Let It Be Guitar Lesson
This popular Beatles song is an easy song to play and a great choice for beginners.
Many guitar learners struggle with the F chord, but don’t worry—Steve shares some solid tips on how to transition smoothly and play it comfortably. He also breaks down proper finger positioning to help you master F major with ease.
Strumming Pattern
You can keep it simple by playing this song entirely with downstrokes. However, if you want to add a little more rhythm, you can go with this pattern: DDDUDDDU.
A key thing to remember here is to keep your strumming hand moving at all times, even if you're not hitting the strings with every motion. This technique, often seen in older rock songs, helps create the right rhythmic feel.
Song Structure
The song follows a classic verse-chorus structure, but with subtle shifts that make it more dynamic.
- Intro: You’ll start with two chords per measure, but pay attention to the rhythm as it sets the tone for the whole track.
- Verse: The same two-chords-per-measure pattern continues here, but consistency in your strumming is key. If your rhythm slips even a little, it throws off the groove.
- Chorus & Bridge: These sections reuse the verse’s chord progression, but the transitions feel tighter and more energetic.
Steve walks you through how to manage these shifts without losing momentum, especially the jump between sections, which trips up a lot of learners.
Rhythm & Right-Hand Technique
Even though the chords in this song are simple, the rhythm requires practice. Once the lyrics kick in, the right hand needs to move at 16th note speed (which are four evenly spaced notes for every beat) to create the desired groove. The trick here is that you don’t have to hit the strings every time—just keep your hand moving consistently to stay in time.
Mastering this technique will not only make your playing sound great but will also help build your overall strumming coordination.
Why Learn Let It Be?
- It's an easy song with simple chords, making it great for beginners.
- Helps improve chord transitions, especially switching to and from F major.
- Teaches right-hand rhythm control, a skill that translates to many other songs.
- Works as a great sing-along song, making it fun to play with others!
FAQs – Let It Be Guitar Lesson
Q1. Do I need a capo?
No, Let It Be is played in the key of C and doesn’t require a capo.
Q2. Can I use a different strumming pattern?
Absolutely! You can stick with simple downstrokes or try the DDDUDDDU pattern for more variation. Just remember to keep a steady rhythm.
Interesting Fact: This classic Beatles song has a heartfelt story behind it. Paul McCartney wrote Let It Be after dreaming of his late mother, Mary, during a stressful time for The Beatles in 1968. In the dream, she comforted him, saying, “It will be all right, just let it be.” That message stayed with him and became the heart of the song. While many assume "Mother Mary" refers to the Virgin Mary, McCartney says it's open to interpretation.
Introduction
Torrins brings you a detailed guitar lesson on another late-1990s rock hit, Jumper, by the American rock band Third Eye Blind. In this tutorial, our expert instructor, Steve Luciano, breaks down this acoustic power pop song, sharing valuable insights to help you master it on guitar.
This guitar song tutorial covers Intro, Chords, Rhythm, and comes with Tabs and Lyrics for an all-rounded playing and learning experience.
Chords Used in Jumper Guitar Lesson
This song features a mix of open and extended chords, creating a rich and dynamic sound.
The song is originally written in the key of C major and has a time signature of common time and a tempo of 88 beats per minute.
Steve Luciano teaches this song using 5 chords two of which are Fmaj7/C and D4add9. Check out the complete lesson to know the rest.
Chords used: Fmaj7/C and D4 add 9
Steve shares a simple hack to play D4add9, making it easier to transition smoothly between chords. He also covers detailed finger positioning to ensure clarity in each chord change.
Strumming Pattern
Pattern: DDDUDUUD
The song follows a 4/4 time signature, but what makes it unique is the 16th note rhythm in the intro. Your right hand moves four times as fast, but you don’t have to hit the strings every time—just keeping your hand moving at that pace gives the desired groove. Steve breaks down this technique in the lesson to help you nail the feel of the song.
Song Structure
This song follows a verse-chorus format, with rhythmic variations adding energy to different sections.
- Verse: The first measure contains two chords, while the next measure is a full measure of one chord.
- Chorus: Features a groovier and faster rhythm, helping you develop better control in your right hand.
- Muting Technique: In parts of the song, Steve demonstrates how to mute the strings while playing Fmaj7/C, creating a percussive effect. If you struggle with this, he also teaches an alternative approach.
Why Learn the Jumper song on guitar?
- Improves right-hand independence and left-right hand coordination for smoother transitions.
- Teaches unique strumming techniques that add groove and freshness to your playing.
- Helps develop speed and precision, making your playing sound more natural and effortless.
Tips for Playing the Jumper Song Smoothly on Guitar
- Practice chord transitions first before focusing on strumming.
- Loosen your grip to achieve proper string muting in certain sections.
- Focus on feeling the rhythm, especially during faster, groove-heavy parts.
FAQs – Jumper Guitar Lesson
Q1. Is this song beginner-friendly?
A: The Jumper song on guitar is best suited for intermediate players due to its faster rhythm and complex strumming patterns.
Q2. What if I struggle with the faster rhythm?
A: In that case, practice the strumming motion slowly first before speeding up. The key is keeping your right hand moving consistently.
Recording Fun Fact: For Jumper, Stephan Jenkins wanted a deep, thudding drum sound, so they recorded in a small room with the doors open for a natural "breathing" effect. He even had drummer Brad Hargreaves switch to smaller sticks for a more controlled feel, kind of like a Beatles-style recording trick!