
Introduction

Introduction
Wake Me Up When September Ends is one of the most iconic songs from the American punk rock band Green Day. It is the fourth single from their seventh studio album, American Idiot, which was released in 2004. The lead vocalist Armstrong, wrote the lyrics of this song after his father's death in September 1982.
Chords Used in Wake Me Up When September Ends
Arpeggios Verse & Chorus Chords: Open chords. The song is played in the key of G, and there is no need for a capo.
Chorus Variation: The chorus of the song is pretty short, and the guitar chords used in it are similar to those of the verse.
Strumming Pattern
The entirety of the song follows the same strumming pattern: Down-Up, Down-Up, Down-Up. (DUDUDU)
Song Structure
Introduction: In this section, J.J. Pattishall will explain the key you need to play the song in.
Song Arrangement: Here, you will learn how and why the guitar instructor has broken down this song into several different parts. This particular section will show you how to play the guitar parts of the intro, verse, chorus, and bridge.
Rhythm: Here, you will learn the open chords used to provide backing rhythm to the verse and chorus of the song.
Song Demo: Right here, after showing you how to play all the different chords for this song, J.J. Pattishall will show you how to play the guitar alongside the song.
Solo Lesson: This is the last part, where you learn how to play the epic solo from the song.
Wake Me Up When September Ends
Introduction
Song Arrangement
Rhythm
Song Demo
Solo Lesson
Unlock Full Access to Lyrics & Chords with Torrins Membership
Unlock with premiumIntroduction
Wake Me Up When September Ends is one of the most iconic songs from the American punk rock band Green Day. It is the fourth single from their seventh studio album, American Idiot, which was released in 2004. The lead vocalist Armstrong, wrote the lyrics of this song after his father's death in September 1982.
Chords Used in Wake Me Up When September Ends
Arpeggios Verse & Chorus Chords: Open chords. The song is played in the key of G, and there is no need for a capo.
Chorus Variation: The chorus of the song is pretty short, and the guitar chords used in it are similar to those of the verse.
Strumming Pattern
The entirety of the song follows the same strumming pattern: Down-Up, Down-Up, Down-Up. (DUDUDU)
Song Structure
Introduction: In this section, J.J. Pattishall will explain the key you need to play the song in.
Song Arrangement: Here, you will learn how and why the guitar instructor has broken down this song into several different parts. This particular section will show you how to play the guitar parts of the intro, verse, chorus, and bridge.
Rhythm: Here, you will learn the open chords used to provide backing rhythm to the verse and chorus of the song.
Song Demo: Right here, after showing you how to play all the different chords for this song, J.J. Pattishall will show you how to play the guitar alongside the song.
Solo Lesson: This is the last part, where you learn how to play the epic solo from the song.
Wake Me Up When September Ends
Introduction
Song Arrangement
Rhythm
Song Demo
Solo Lesson
Unlock Full Access to Lyrics & Chords with Torrins Membership
Unlock with premiumExplore More in English Songs


Similar Pop Songs
Introduction
Get ready to master another hit song on Torrins—If It's Love by Train. This moderate-level lesson is taught by Steve Luciano, who breaks down the song into easy-to-follow sections. You'll learn about the chords, strumming patterns, and intricate techniques that make this song so engaging. Steve also shares detailed tips on finger placements and rhythm to help you recreate the authentic feel of the original track.
Fun Fact: If It's Love was written on the same day as Train's hit Hey, Soul Sister in New York City. Pat Monahan wrote it as a love song for the band's long-time fans, thanking them for their unwavering support over the years.
Chords Used in If It's Love
The song is tuned half a step down and features a mix of standard and suspended chords. Some of the key chords used include:
- G triad
- G chord
- Gsus4
- Csus4
- D4
- Dsus/F#
- G/B
Tune in to the lesson to learn the other chords that make up this song. Steve carefully explains the finger placements for these chords, especially complex chords like Dsus/F#, to ensure you get the right tone.
Strumming Pattern
The song starts with a drum section, and Steve demonstrates how to simulate that drum feel using strumming techniques.
- In the beginning, the rhythm follows a 16th note pattern: DUDUDUD
- As the song progresses, the pattern shifts to: DDUUUD
Steve emphasises the importance of keeping your right hand moving to maintain a consistent rhythm. He also explains how to incorporate sliding and arpeggios into your strumming to enhance the song's texture.
Song Structure
If It's Love follows a clear and structured format. Tune in to the lesson to understand the arrangement of the song.
In the beginning, Steve uses just 3–4 chords, making it approachable for most players.
As the song progresses, he introduces more complex chords like Dsus/F#, adding depth to the arrangement
Steve concludes the lesson by playing along with the song, demonstrating smooth transitions between sections.
Improvisation Techniques
For more advanced players, Steve teaches how to improvise over the progression using slides and arpeggios. He also explains how to replicate the original feel of the song by experimenting with the rhythm and strumming intensity.
Why Learn If It's Love?
This song is an excellent way to improve your chord transitions and rhythm skills. It also introduces suspended chords and alternate fingerings, helping you build greater versatility in your playing.
Tips to Control Strumming Intensity:
- Keep the beginning section light with gentle strumming.
- Add more intensity in the chorus by strumming harder and using accents.
- Maintain a steady rhythm throughout the song to keep the groove intact.
FAQs – If It's Love Guitar Lesson
Q1. How can I improve my rhythm and timing?
Practice with the backing track and focus on Steve’s tips for simulating the drum section with your strumming.
Q2. Do I need to tune down my guitar?
Yes, the song is tuned half a step down for an authentic sound.
Q3. How can I handle the suspended chords more smoothly?
Steve suggests specific finger placements and transitions to make switching between suspended chords easier.


Introduction:
Get ready to learn You Send Me by Sam Cooke with instructor Mike Dugan on Torrins. This lesson covers everything from basic chords and strumming patterns to advanced solo techniques, making it suitable for both beginners and more experienced players. Mike breaks down the song step-by-step, helping you match your vocals with the chords and refine your rhythm for a polished performance.
Fun Fact: This was Sam Cooke’s debut single and it was a glorious debut– it peaked at number 1 position on both Billboard's Rhythm & Blues Records chart and the Billboard Hot 100. It was also named as one of the 500 most important rock and roll recordings by the Rock & Roll Hall of Fame.
Chords and Techniques Used in You Send Me
- Key: The original song is in the key of F for vocals, but Mike moves it to the key of G since it’s easier to follow on the guitar.
- Chords Used:
- G, D or D7, Am, and others
- He explains easy chord transitions and provides alternatives for beginners struggling with barre chords.
- Strumming Pattern:
- For Beginners:
- Use downstrokes, with two strums per chord for the verse.
- The verse uses open chords, with downstrokes on the numbers and upstrokes on the "and" counts.
- Tip: Don’t force the upstrokes—keep them light and natural.
- For Advanced Players:
- Mike demonstrates an advanced rhythm pattern using downstrokes with a triplet feel.
- He explains how to create a smoother, more dynamic strumming effect.
- For Beginners:
Song Structure
- Verse 1 and Verse 2: The two verses follow the same chord pattern and strumming technique. He also teaches how to match your vocals with the chords for a cohesive sound.
- Bridge: The bridge includes barre chords, but Mike teaches open chord alternatives for beginners. He explains the correct positioning for barre chords in detail to help you improve your grip and clarity.
- Solo Section: The solo is in the key of G major. The lead follows the relative minor of G (E minor), using the E minor pentatonic scale. For advanced players, he demonstrates a creative technique that makes the solo sound very close to the original recording.
Why Learn You Send Me?
This lesson not only teaches you how to play the song but also helps you develop better rhythm, improve chord transitions, and explore creative soloing techniques. The mix of beginner-friendly guidance and advanced options makes it a well-rounded learning experience.
Tips to Improve Your Playing
- Start slow with the strumming pattern to build muscle memory.
- Focus on smooth transitions between chords.
- For the solo, practice the E minor pentatonic scale separately before combining it with the backing track.
- Follow along with the tabs provided for a comprehensive learning experience.
FAQs – You Send Me Guitar Lesson
Q1. Is this song suitable for beginners?
Ans: Yes! The lesson includes beginner-friendly chords and strumming patterns, along with alternatives for challenging barre chords.
Q2. What’s the best way to improve my chord transitions?
Ans: Start slowly and focus on switching between two chords at a time before increasing your speed.
Q3. Do I need a capo for this song?
Ans: No capo is required, but you can experiment with different chord voicings to match your vocal range.


If You Like Green Day, You'll Love These


Introduction
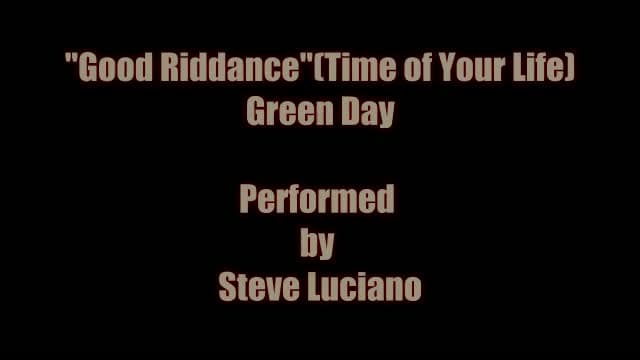
Tune in to the detailed guitar lesson for Good Riddance (Time of Your Life) on Torrins. This ballad, performed by the American rock band Green Day, is broken down step by step by our expert instructor, Steve Luciano. He explains the song’s various elements for better understanding, including chords, rhythm, and the backing track. The difficulty level of this tutorial ranges from beginner to intermediate.
Chords Used in Good Riddance (Time of Your Life) Guitar Lesson
Verse & Chorus Chords: The verse and chorus section uses open chords
Make use of the tabs provided with the lesson to follow along smoothly, understand finger placement, and improve your accuracy. The G chord in this song has a slightly more complex finger positioning than what beginners might be used to, but Steve breaks it down clearly to make it easier to play. He also offers alternative ways to approach the D/F# chord in case you find it challenging.
Strumming Pattern
Pattern: D-D-U-U-D
This pattern is played twice to complete one measure (four beats).
Steve shares great strumming tips to make the sound more defined.
Chord Transitions: Steve teaches smooth chord changes, such as G to Cadd9. Play along with Steve to get a good control over transitions.
Final Playthrough: Steve plays along with the song, showing how the full arrangement comes together.
Improvisation & Playing Techniques
- Learn how to make the full-sounding open-string G chord properly.
- Gain control over the Cadd9 chord, a popular chord in pop music.
- Tips for transitioning smoothly between chords.
Pro Tips from Steve
- Start slow – Play the melody in your head before playing along with the track, as the song has a fast strumming tempo.
- Focus on chord clarity and bass notes to make your playing sound cleaner.
FAQs – Good Riddance (Time of Your Life) Guitar Lesson
Q1. Is this song beginner-friendly?
A: Yes! While the song has a slightly complex G chord and a D/F# transition, it is still manageable for beginners with practice.
Q2. What strumming pattern is used in this song?
A: The strumming pattern is D-D-U-U-D, played twice per measure. Steve also shares tips on how to make the rhythm sound more natural and which strings to emphasize to achieve a sound closest to the original version.
Q3. Do I need a capo for this song?
A: No capo is required. The song is played in the key of G, using open chords.
Q4. Is this song played on an acoustic guitar?
A: Yes! The song is originally played on an acoustic guitar. However, you can use a clean electric guitar tone for a similar feel.
Fun Fact: The album version of this song begins with Billie Joe Armstrong messing up the opening chords twice before starting over and getting it right. These mistakes were deliberately kept to add a lighthearted introduction to the song.
The Good Riddance (Time of Your Life) song lesson is played in the key of G, and some of the chords used in this popular song include G, Cadd9, D, and D/F# (D with F# in the bass). Check out the complete lesson to learn the other chords that make up this song.